
When you first install VMware Workstation or VMware Player, one of the most critical yet often misunderstood aspects is how virtual machines connect to networks. Whether you're building a home lab, testing network configurations, or running isolated environments, understanding VMware's networking architecture is essential for any network engineer or system administrator.
In this comprehensive guide, we'll break down how VMware networking works from the ground up. We'll explore the three fundamental network types that VMware creates, understand their use cases, and learn how to configure them effectively for different scenarios.
By the end of this guide, you'll have complete clarity on:
- How virtual machines communicate with your physical network
- The difference between Bridged, Host-only, and NAT networks
- When to use each network type
- How to configure VMware's Virtual Network Editor
Let's start by accessing the core of VMware networking.
This is the first part of the blog:
Accessing VMware Virtual Network Editor
To view and configure VMware's network settings, navigate to:
Edit > Virtual Network Editor > Change Settings
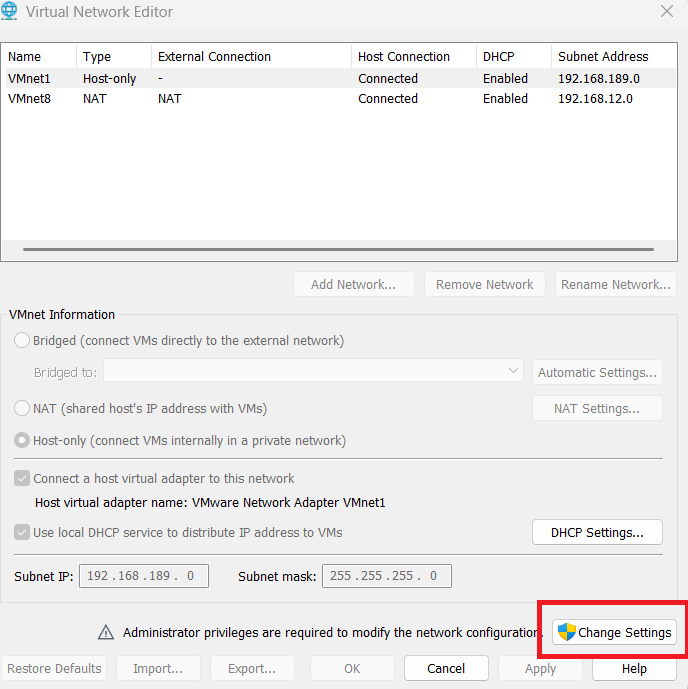
Here, you'll see VMware has created three default virtual networks, each serving a distinct purpose:
- VMnet0 - Bridged Network
- VMnet1 - Host-only Network
- VMnet8 - NAT Network
These are logical networks - software-defined constructs that determine how your virtual machines connect to your home or enterprise network. Each network type behaves differently, and understanding these differences is crucial for proper VM deployment.
Let's start with the first and most direct network type: Bridged Network.
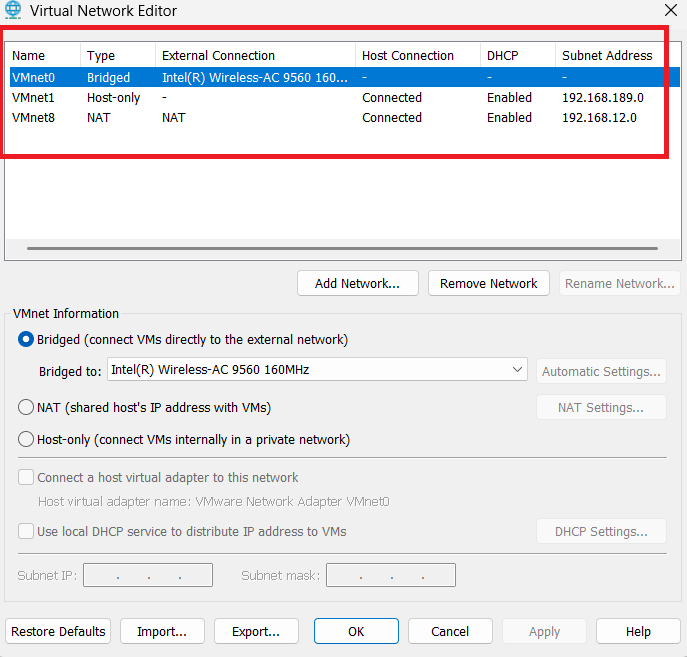
Understanding VMware Bridged Network (VMnet0)
What is Bridged Network in VMware?
A Bridged Network in VMware acts as a direct connection between your virtual machine and your physical network. Think of it as plugging your VM directly into the same network switch or router that your host PC is connected to.
VMnet0 is the virtual network adapter that VMware assigns to Bridged networking by default. When you connect a virtual machine to VMnet0, you're essentially telling VMware: "Make this VM act like a physical computer on my home/office network."
How Bridged Network Works
When you configure a VM to use Bridged mode:
- Direct Network Access: The VM appears as a separate physical device on your network, just like any other computer connected to your router
- Same IP Series: Your VM receives an IP address directly from your router's DHCP server - in the exact same IP range as your host PC
- Physical Adapter Selection: You can bridge to either your wireless adapter (Wi-Fi) or ethernet adapter, depending on how your host PC connects to the network
For example, if your host PC has the IP address 192.168.1.10 from your router, a VM in Bridged mode might receive 192.168.1.15 - both in the same subnet, both assigned by the same router.
Bridging to Your Physical Network
In the Virtual Network Editor, you'll see that VMnet0 can be bridged to your available network adapters. In my setup, VMnet0 is currently bridged to my wireless network adapter. However, you can change this to bridge to your ethernet adapter if your host PC uses a wired connection.
The key point: the VM gets its IP directly from your router, making it a full participant on your physical network - no translation, no isolation.
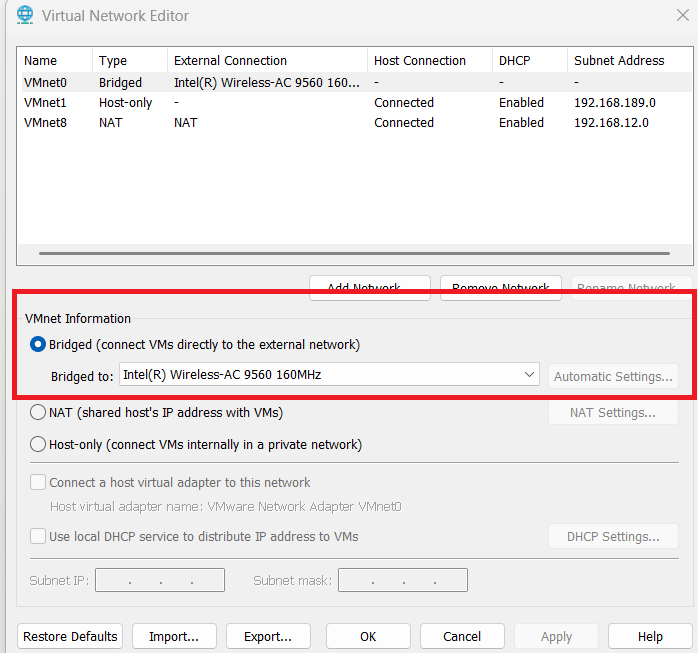
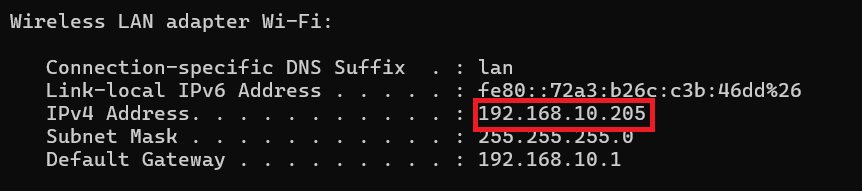
As you can see, My bridge network is connected with my wireless network.
This is my phycisal windows pc which is running vmware workstation. It got the ip 192.168.10.205 from the router
Connecting a VM to Bridged Network
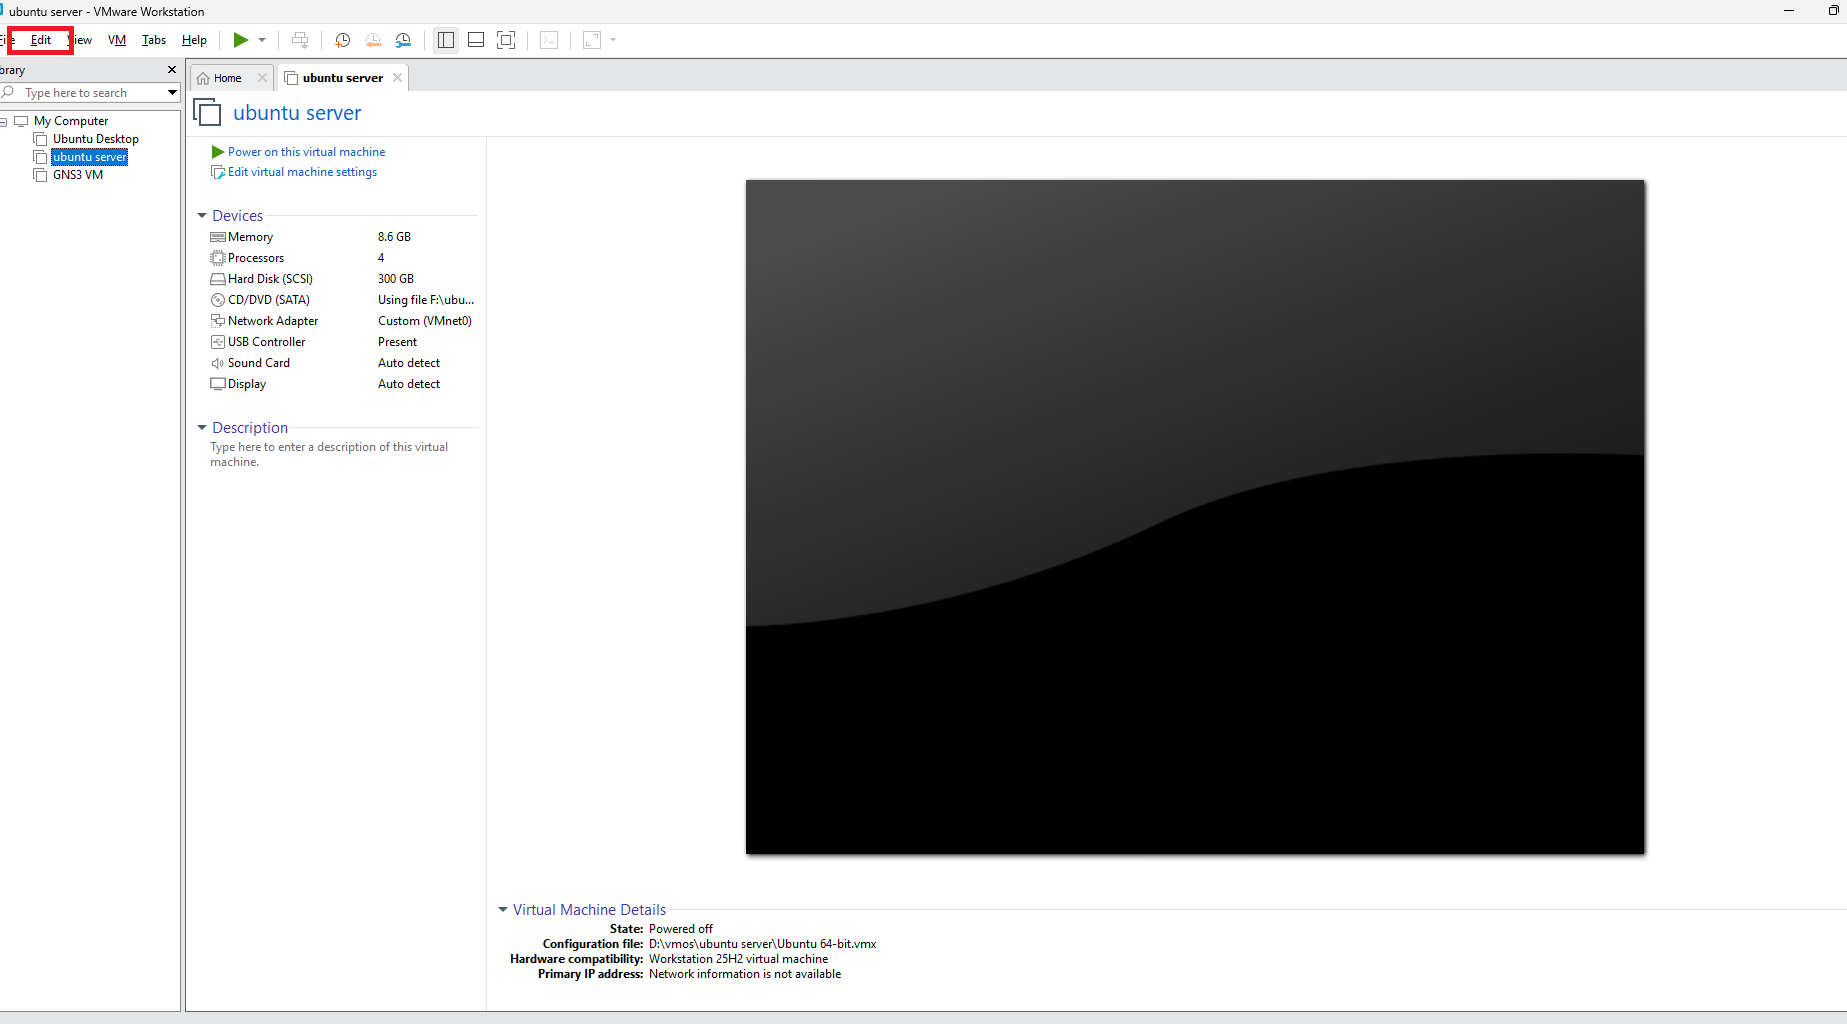
Now let's see how to actually connect a virtual machine to this Bridged network. I'll demonstrate using an Ubuntu Server VM as an example.
Step-by-step configuration:
- Select your VM - In VMware Workstation, click on your Ubuntu Server (or any VM) from the library
- Open Settings - Right-click and select Edit virtual machine settings (or click "Edit virtual machine settings" from the VM tab)
- Navigate to Network Adapter - In the Hardware tab, click on Network Adapter
- Select Network Type - You have two options here:
- Choose Bridged directly, or
- Choose Custom and select VMnet0 (Bridged) from the dropdown menu
Both methods achieve the same result - connecting your VM to VMnet0, the Bridged network.
Save the settings and power on your Ubuntu Server.
Once the VM boots up, check the IP address (using ip addr or ifconfig command in Ubuntu). You'll notice that the VM has received an IP address from your router - in the same subnet as your host PC.
For example, if your host PC has 192.168.1.10, your Ubuntu Server might get something like 192.168.1.25 - both assigned by the same router, both on the same physical network. The VM is now a fully accessible device on your network, just like any other computer connected to your router.
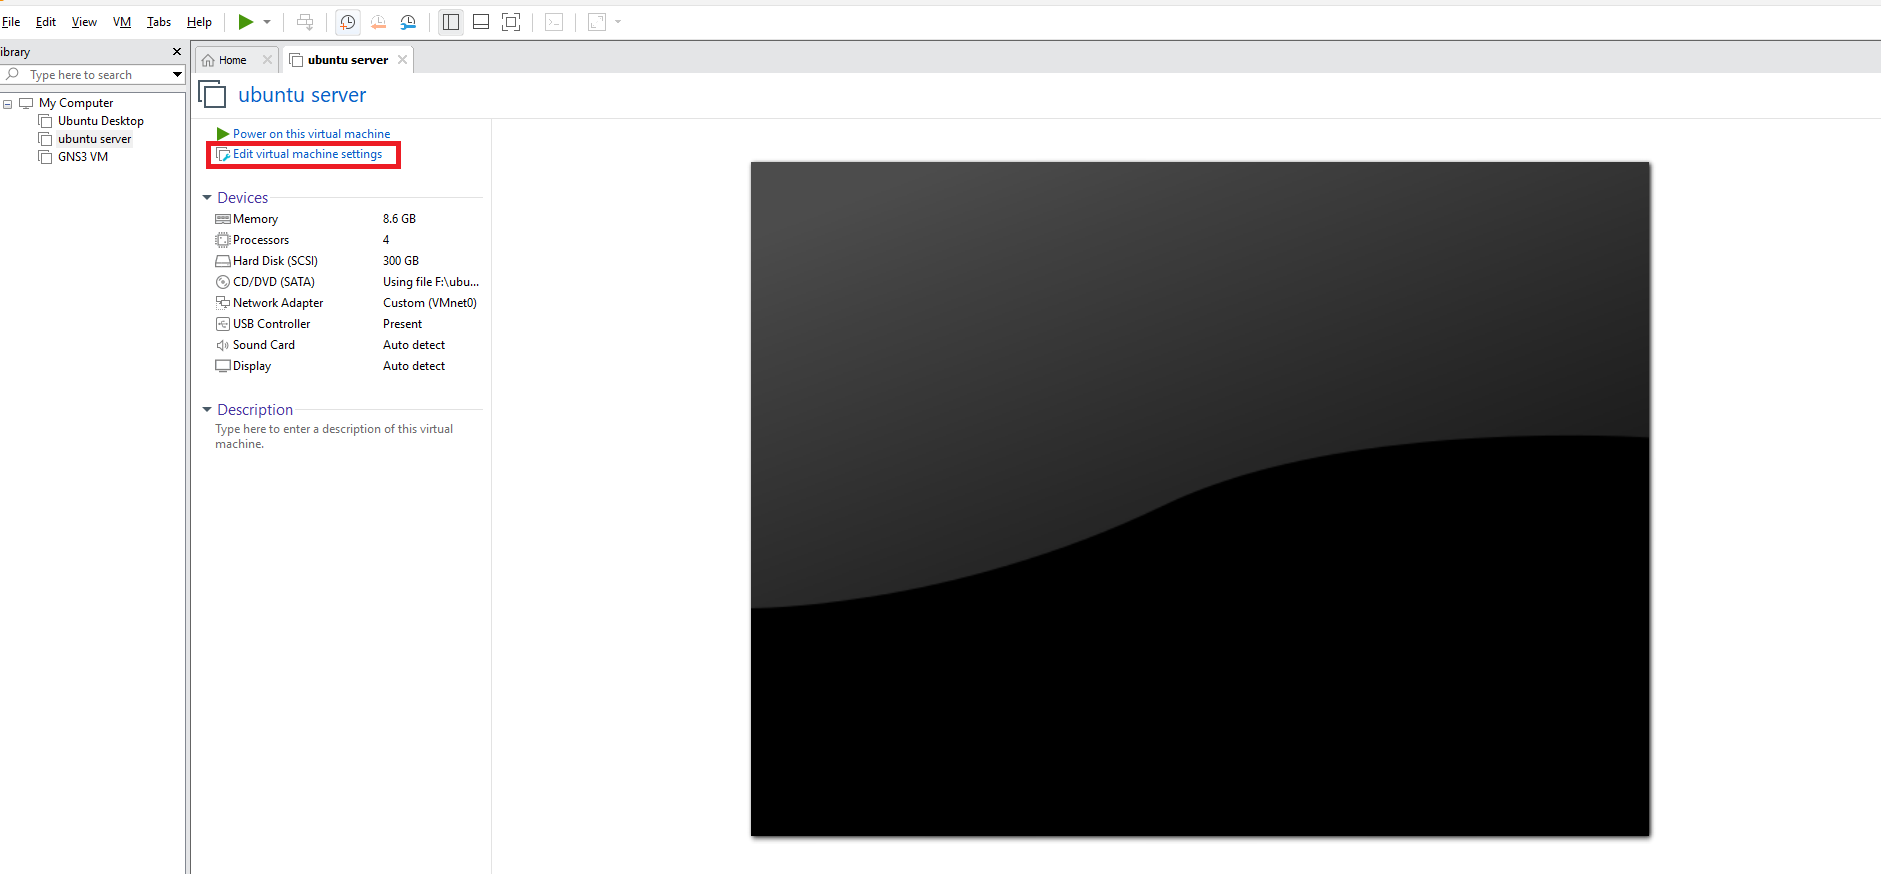

As you can see i have selected vmnet0 for the ubuntu server host. you can also select direct Bridged Network. Then I ran ip addr command in ubuntu.

And it got the same series ip as my windows pc.
1. When to Use Bridged Network (Use Cases)
- Running servers that need to be accessible from other devices on the network
- Testing network configurations as if VM is a physical machine
- File sharing between VMs and physical machines on same network
- When you want VMs to be discovered by other devices (printers, NAS, etc.)
2. Advantages of Bridged Mode
- Best network performance (no translation overhead)
- VM fully accessible from anywhere on the network
- Simplest configuration for network services
- Real-world network testing
3. Disadvantages/Limitations
- IP address consumption - Each VM takes an IP from your router's DHCP pool
- Security exposure - VM is directly exposed to network threats
- Mobility issues - If you move laptop to different network, VM network breaks
- Dependency on physical adapter - If host loses network, VM loses it too
- MAC address conflicts - Each VM gets unique MAC, but can cause issues in some networks
4. MAC Address Assignment
- Each VM gets a unique virtual MAC address
- This makes the VM appear as a separate physical device to the router
- Can be customized if needed
5. Network Visibility
- Other devices on network can ping/access the VM
- VM can access other devices on network
- Useful for server deployments, problematic for isolation
6. IP Assignment Options
- DHCP (automatic) - Most common
- Static IP - Can be configured inside VM OS
- Should be in same subnet as physical network
Conclusion
In this first part of our VMware Networking series, we've covered the fundamentals of Bridged Network (VMnet0) - the most direct way to connect your virtual machines to your physical network. We explored how Bridged mode works, why your VMs receive IP addresses in the same subnet as your host PC, and how to configure a VM to use this network type through VMware's Virtual Network Editor.
Understanding Bridged networking is crucial because it forms the foundation of VMware's networking architecture. When you need your VMs to behave like physical machines on your network - accessible, discoverable, and directly connected to your router - Bridged mode is your go-to choice.
However, Bridged networking is just one piece of the puzzle. VMware provides two more network types that serve entirely different purposes: Host-only Network (VMnet1) and NAT Network (VMnet8). Each has its own use cases, advantages, and configuration methods.
In the next blog, we'll dive deep into:
- Host-only Network (VMnet1) - Creating isolated networks between VMs and host
- NAT Network (VMnet8) - Sharing your host's IP address with VMs
- When to use each network type
- Advanced configuration scenarios
Stay tuned for Part 2 of this comprehensive VMware Networking guide!
VMware NAT Network Setup and Port Forwarding Tutorial | Step-by-Step Guide ( Part 2 )